AY-234
A soil monolith represents a vertical slice of soil in its natural position. It is used to display soils and their properties for a variety of educational purposes. Commonly, a monolith measures 4-8 inches wide by 48 inches deep by an inch or so thick, and weighs about 15 pounds.
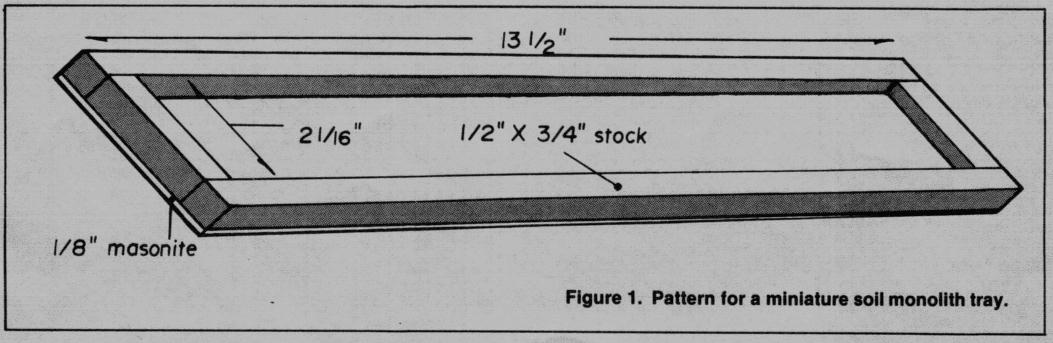
A miniature soil monolith is a proportional representation of a normal soil monolith but only about one-fourth the size--i.e., 2 inches wide by 12 inches deep. Although smaller than the natural soil profile, it shows each horizon in that profile, having the same appearance in proportion to the original. A miniature monolith requires less space for display and storage, and is relatively cheap and easy to make.
This publication presents a step-by-step procedure for making miniature monoliths. It briefly discusses the materials required (whether purchased or homemade) and how to properly collect and mount the soil horizon samples. Not only is the end product an easy way to observe soil profiles, but the process of preparing a miniature monolith also furnishes a valuable teaching experience toward understanding soils and their properties.
The following are the basic items used in making a soil monolith. You should have them on hand ahead of time.

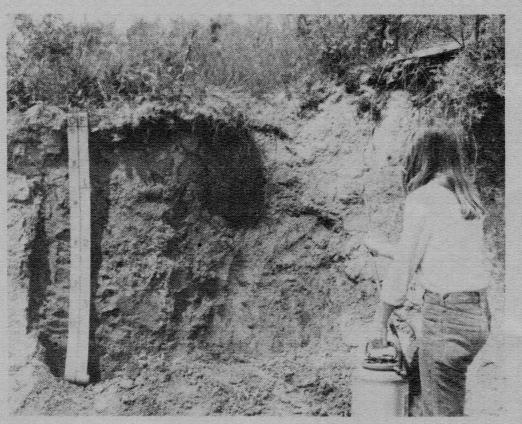
Step 1. Dig a pit 4 feet deep or preferably find a roadcut or construction site that contains the particular soil feature you wish to demonstrate. The soil should be moist enough so as not to crumble when removed. If too dry, moisten it by spraying with a garden sprayer.
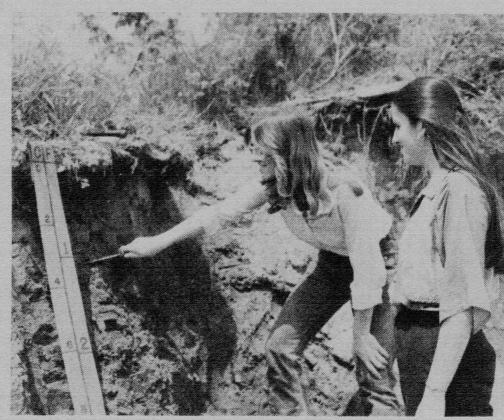
Step 2. Identify each of the soil horizons. Horizons are the layers of soil that differ from one another in texture, color, acidity (ph), soil structure and the like. Measure and mark the horizon boundaries. (See Purdue Extension Publication ID-72, "Understanding and Judging Indiana Soils," for an explanation of how to identify important soil features; or consult your local NRCS district conservationist, county Cooperative Extension Service educator, or vocational agriculture teacher.)
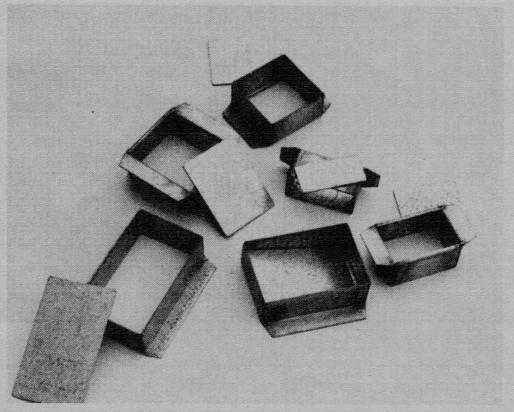
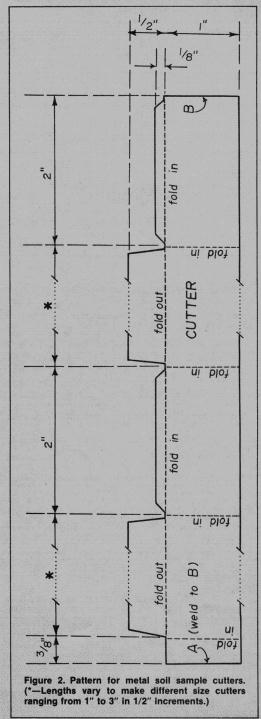
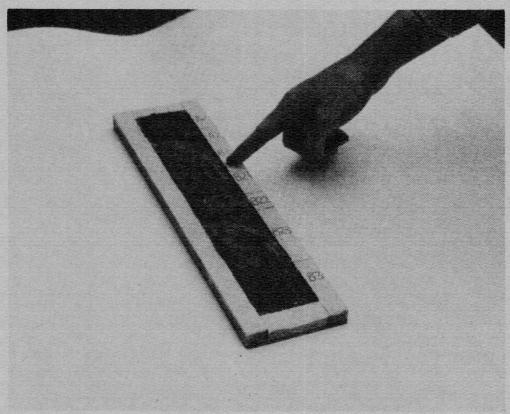
Step 3. Select the correct cutter size to use for each soil horizon--i.e., one which is one-fourth the horizon depth. For example, if a horizon is 6 inches deep, a 1 1/2-inch cutter would be used. Don't forget, a set of horizon samples must add up to exactly 12 inches.
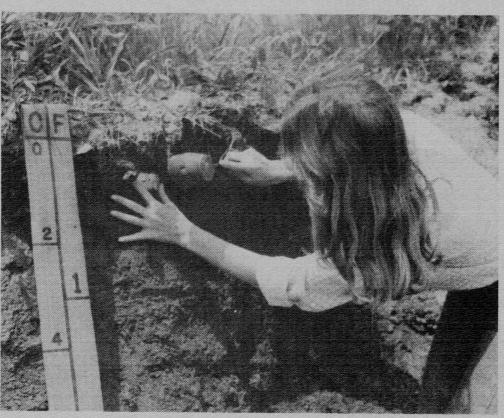
Step 4. Beginning with the top horizon (then later repeating the procedure for each horizon in the profile), gently tap the cutter approximately into the middle of the horizon with the rubber mallet until it is flush with the face of the soil pit. If the cutter is driven too far, it will compact and reorient the natural soil structure.
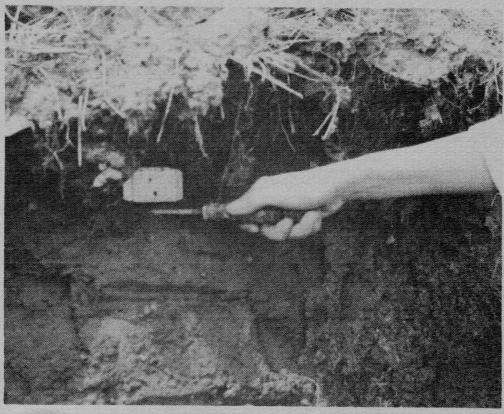
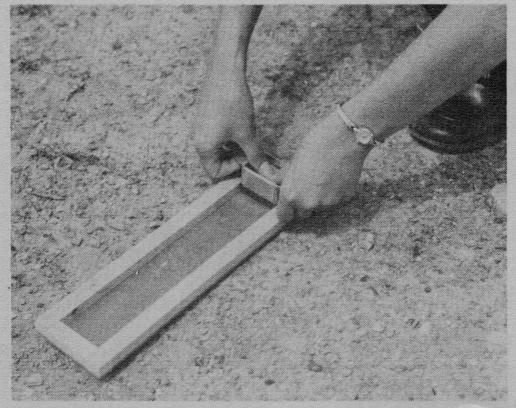
Step 5. Remove the soil-filled cutter first by trimming around it with the knife, making sure all roots, and soil are cut; then by prying it carefully from the pit face.
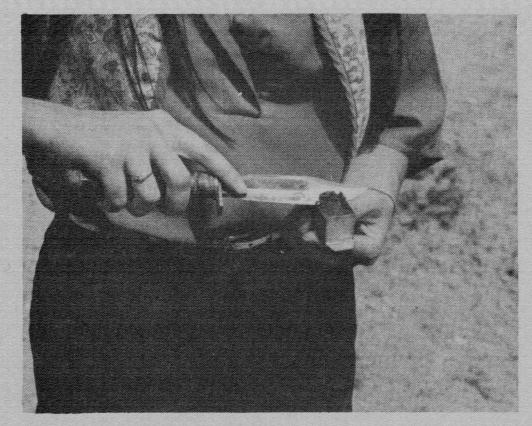
Step 6. After the cutter is removed, scrape off excess soil from around the edges of the cutter and from the open end.
Step 7. Now place the cutter in the monolith tray; and with as little pressure as possible, push the soil out by pressing down on the backplate with the thumbs and upon the flanges on the sides of the cutter with the forefingers. Then gently remove the backplate from the soil surface; if soil is sticking to the plate, removing it carelessly could pull too much soil off with it.
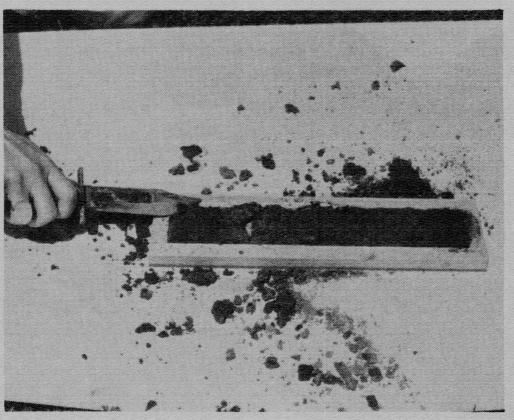
Step 8. Using the knife, pick at the surface of the completed monolith to eliminate the gaps between the horizons and to restore the soil's natural appearance. Do this while the soil is still slightly moist; if too wet, allow it to dry somewhat before picking. Experience will be the best guide as to proper moisture content.
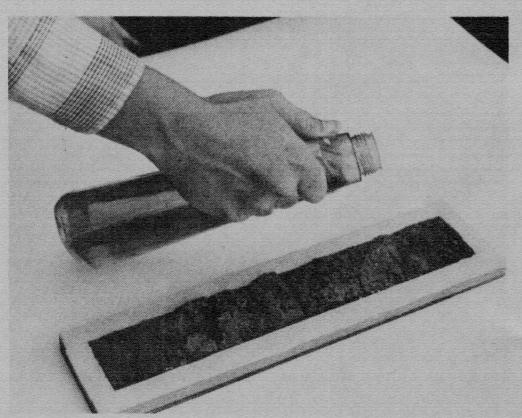
Step 9. After allowing the soil to air-dry, pour on enough fixative to fill the pores but not cover the surface. This seals and hardens the monolith and gives it a moist, natural look. Immediately wipe off any fixative that gets on the wooden frame.
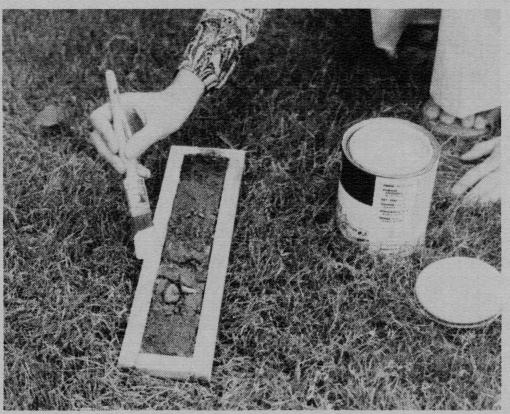
Step 10. Once the fixative has dried completely (approximately 24 hours), paint the outside edges of the tray a pale yellow. This color enhances the natural soil color and makes the monolith more realistic in appearance.
Step 11. Finally, label the various horizons. These can be either the descriptive names like `topsoil', subsoil' and `parent material', or the A, B, C horizon designation used by soil scientists who classify and map soils.
New 10/81
Cooperative Extension work in Agriculture and Home Economics, state of Indiana, Purdue University, and U.S. Department of Agriculture cooperating; H. A. Wadsworth, Director, West Lafayette, IN. Issued in furtherance of the acts of May 8 and June 30, 1914. Purdue University Cooperative Extension Service is an equal opportunity/equal access institution.